
How to Install Brick Pavers: The CMA Method, Step by Step
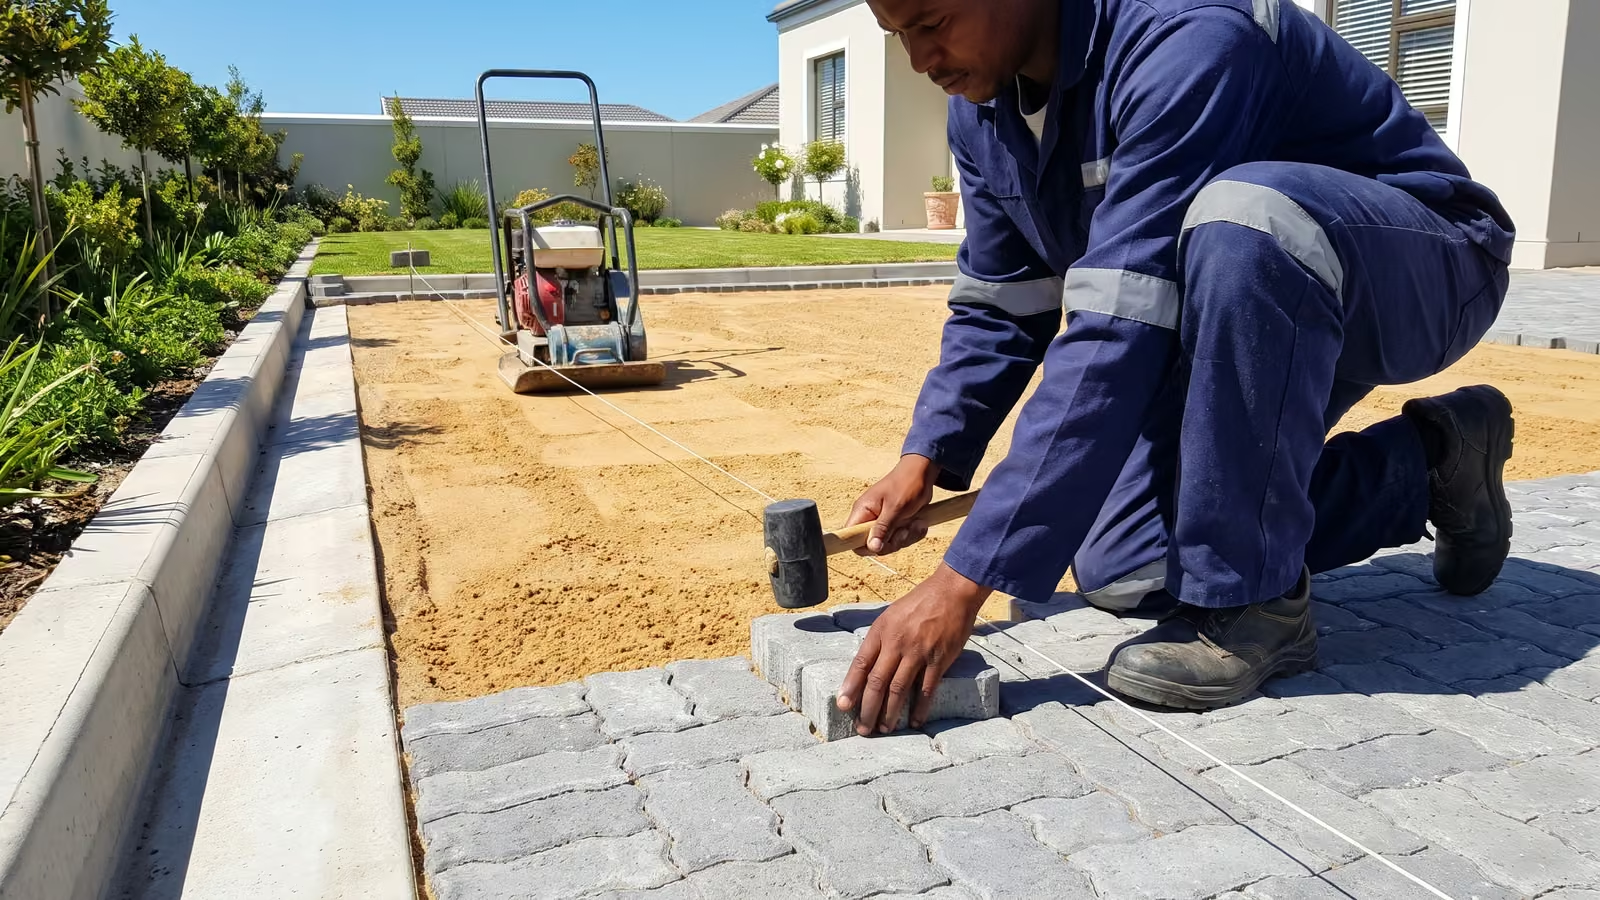
To install brick pavers, dig to the right level, compact the ground, set the kerbs, screed a thin bed of river sand, lay the pavers, compact them and sweep dry sand into the joints. The CMA's homeowner guide sets the finished base level at 20mm plus the paver thickness below the finished surface, because 25mm of damp bedding sand compacts to about 20mm. Edge restraints go on the subbase before any pavers are laid. The paving then gets at least two compaction passes before any jointing sand goes in.
- Base level: 20 mm + paver thickness below the finished surface (CMA)
- Bedding sand: 25 mm, plus or minus 10 mm, after compaction (CMA)
- Joints: 2 to 6 mm, with an average of 3 mm (CMA)
Get a paving quote
Choose the job, the size and the area, and leave a number. Paving for Africa phones or WhatsApps you back.
Or call / WhatsApp 062 397 4233 · open WhatsApp
How to install brick pavers in eight steps
The steps follow the Concrete Manufacturers Association's homeowner guide and its specification, Book 3, with the points where Bosun and the Clay Brick Association differ.
1. Measure and order
Work out the area as length x width and add 10% more for cutting and wastage, as the CMA advises. Makers' counts per m² and a calculator are on our page on how many pavers per m².
2. Dig to the right level
The CMA puts the finished base level 20mm plus the paver thickness below the finished surface. Its homeowner guide asks for a minimum slope of 1 in 50 in one direction and 1 in 100 in the other, and for the paving to slope away from the garage floor level.
3. Compact the ground
For domestic driveways and paving that only carries people, the CMA's earthworks note says natural ground will normally provide sufficient strength, subject to three conditions. Fill material must be compacted to avoid settlement. The ground must not get waterlogged, from below or from water ponding on top. Its surface must be free from weeds or tree roots and finished smooth to the required tolerance. Bosun recommends a roller, a plate compactor of at least 75kg or a jumping jack to compact the earth to the point of refusal.
The top of the subbase carries the falls. The CMA's specification wants the subbase top to fall at least 1% along its length and at least 2% across it. Hollows are filled with subbase material compacted to 98% of modified AASHTO maximum density, and bedding sand is never used for this.
4. Set the edge restraints
The CMA's homeowner guide says kerbs are always required, even where there is no traffic, and none are needed where walls act as edge restraints. It sets kerbs on a 7 to 10cm layer of concrete or dagha. The specification says edge restraints are built on the subbase before any units are laid. Bosun advises against making an edge restraint by digging a trench beside the paving after it is laid and filling it with concrete.
5. Screed the bedding sand
Bedding sand is a thin, even layer, not a levelling course. The CMA's design manual says using it to fill voids in the subbase leads to settlement later. The sources differ on its depth.
| Source | Bedding sand depth and moisture |
|---|---|
| CMA design manual | 25mm plus or minus 10mm after compaction, usually coarse river sand |
| CMA specification | Screeded loose to give 25 plus or minus 10mm compacted, at 6 plus or minus 2% moisture |
| CMA homeowner guide | 25mm damp bedding sand compacts to about 20mm |
| Bosun | 25-35mm compacted, screeded at 30-40mm, with 4-8% moisture |
| Clay Brick Association (clay pavers) | Uniformly 30 mm after compaction; a maximum of 50 mm and a minimum of 20 mm, used only where fixed levels rule out 30 mm |
The CMA settles the loose depth on site with a test: lay a test area of paving on 30 mm of loose sand, compact it with three passes of the plate vibrator, and measure how far it settles. For Cape Town jobs, the CMA notes that certain relatively fine Cape Flats sands are acceptable for bedding.
The homeowner guide says to start screeding from the lowest point and move up the slope. It warns against adding cement to the bedding sand and against compacting the bedding layer before the pavers go on. Plastic sheeting does not belong under it: the CMA says plastic badly affects interlock and does not stop weeds.
6. Lay the pavers
The CMA's specification says joint widths shall be between 2 mm and 6 mm and should average 3 mm over 20 blocks. The Clay Brick Association aims for a joint of 2 to 5 mm with a target of 3mm. For domestic use the CMA says 50 to 60 mm blocks are generally adequate. Cut pieces smaller than about 25% of a full unit are not recommended, as they can be dislodged under traffic.
7. Compact the paving
The CMA's specification calls for at least two compaction passes as soon as practicable after laying, before any jointing sand goes in. By the end of each day, compaction stops no closer than 1 m from any unrestrained edge. The Clay Brick Association compacts with a vibrating plate whose plan area is at least 0.25 m2, then at least two more passes once the joints are filled.
8. Fill the joints
The CMA's homeowner guide uses fine plaster sand, completely dry, for the joints. Its specification repeats the brushing and compaction until the joints remain full after compaction, and warns that damp sand may bridge across the joints and resist compaction. The homeowner guide says not to add cement to jointing sand.
After the paving is laid
- Bosun says sand-grouted paving can be used immediately after grouting, and cement-grouted paving should not be trafficked for seven to ten days.
- The CMA's homeowner guide says to re-sand and vibrate after six months, or after the first heavy rain.
- Bosun says not to seal paving within the first six months after installation.
- On steep slopes over 1 in 20, around downpipes and along roof overhangs with no gutters, the CMA stabilises the jointing sand, using bentonite or proprietary sealers rather than cement.
- For paths with slopes of 1:15 or steeper, the Clay Brick Association treats cement-stabilised bedding sand as a practical approach.
Paving for Africa quotes cement paving supplied and laid per job. The published Cape Town figures are on our page of paving prices in Cape Town. Paving for Africa gives a written, itemised quote per m², with the base, the paver, edging, removal and the verge crossing set out line by line.
Paving installation questions
Is a well-compacted subbase important?
Yes. Bosun recommends compacting the earth to the point of refusal with a roller, a plate compactor of at least 75kg or a jumping jack. The CMA says fill must be compacted to avoid settlement.
Do I need edge restraints for a patio against a house?
No, not along the wall. The CMA's homeowner guide says kerbs are always required, even with no traffic, and that no kerbing is required where walls act as edge restraints.
Why is plastic sheeting beneath paving not recommended?
The CMA's homeowner guide says plastic under the bedding sand badly affects particle interlock and the base structure, and does not stop weeds from growing.
Can I install pavers directly on sand without a gravel base?
Yes, on firm, drained ground. For domestic driveways and paving that carries only people, the CMA says natural ground will normally provide sufficient strength, subject to conditions: fill compacted, ground that does not get waterlogged from below or by ponding, and a surface free of weeds and roots and finished smooth. The pavers still sit on a bedding sand layer, which the CMA's design manual puts at 25mm plus or minus 10mm after compaction.
Should I use polymeric sand or regular sand for joints?
The CMA's homeowner guide uses fine, dry plaster sand and stabilises it only on steep slopes, at downpipes and under gutterless eaves. For its SMARTSAND polymeric sand, Techniseal says the sand must dry completely before rain, 24 hours minimum, and longer in cold or humid weather or in joints wider than 13 mm.